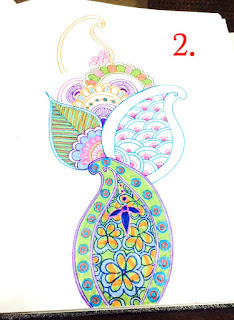
My Cute Frills: Step by step Paisley Art:
Title: Paisley Art
Mediu...: Step by step Paisley Art: Title: Paisley Art Medium: Markers/ Sketch Pens 1. Draw rough outline with pencil. Now copy it marker and sta...
Monday, March 21, 2016
Step by step Paisley Art:
Title: Paisley Art
Medium: Markers/ Sketch Pens
1. Draw rough outline with pencil. Now copy it marker and star filling each shape with easy patterns.
2. 3. Try to outline or double line all patterns. It makes coloring process simpler. Choose colors according to your choice but try to put some contrasts throughout.
4. Once the patterns are totally filled in, color them all with markers. Be careful not to hide any lines.
Once done, its ready to frame and decorate your walls.
Thanks ,
Pragati.
Spring is here, so as the Easter special dress with matching tutu basket for all cuddly duddly ones around all ready to go egg hunting. Here's a dress you would be excited to wear for spring parties, egg hunting extravaganza.
Below is the link which will take you directly to more dresses like this.
https://www.etsy.com/listing/223974517/pink-peach-tutu-dress-with-easter-basket?ref=shop_home_active_16
Thanks!
Pragati
Below is the link which will take you directly to more dresses like this.
https://www.etsy.com/listing/223974517/pink-peach-tutu-dress-with-easter-basket?ref=shop_home_active_16
Thanks!
Pragati
Thursday, March 3, 2016
DIY Paper fortune Cookies.
DIY Paper fortune cookie for parties:
Step 1: Take a sheet of paper. I used neon colors for my daughter's party. Use a bowl or something circular to mark circles on the sheet.
Step 2: I got about 6 circles on 1 sheet. decide accordingly how many fortune cookies you need.
Step3: Just put little glue on one end of the edge and glue as in picture. Make sure it is opened on both ends.
Step4: Insert the fortune in the half folded circle.
Step 5: Fold it from the half point of half circle. It will become like the above picture. Make sure your fortune is hidden on the other side. Now put a drop of glue between the fold and put a clamp to dry or keep holding until it dries.
Step 6: Your fortune cookie is ready for the party and it should look like the above pictures.
Hope you enjoyed paper crafting. this project can be a fun project with kids too.
Thanks!
Pragati
Subscribe to:
Comments (Atom)


